Want to learn how to start a sourdough starter? If you’re a little nervous, you’re not alone. This one step seems so intimidating at first. I’m going to let you in on a little secret: it’s actually incredibly easy. In fact, after you make it once, you’ll wonder what all the fuss was about.
Creating a starter isn’t the full-time job some professional bakers make it out to be. Yes, the carby concoction does need to be on a feeding schedule (kind of like an infant!). You only need to feed your starter daily for the first 2-3 weeks of creating it.
Once you have an established starter, it’s mostly hands-off. You can store it in the fridge and feed it once a week – or as needed before baking.
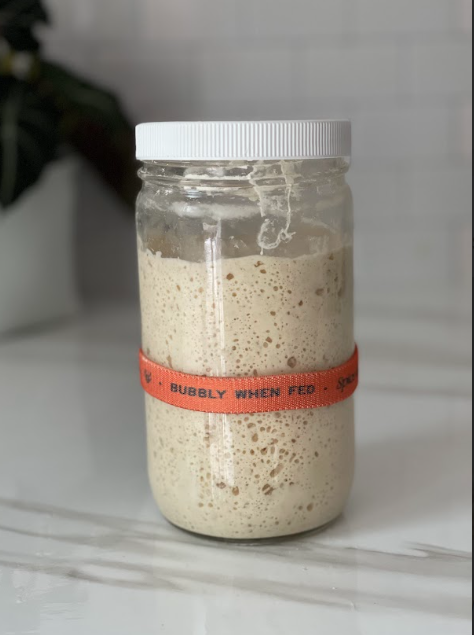
I’ll break down that process step-by-step for you so that you can make your own sourdough starter with confidence. (Of course, there’s always the option to buy my super-strong dry starter, or, better yet, sign up for one of my sourdough courses. I love teaching the old-fashioned way! Still, I truly believe the starter process is simple enough that you can do this solo.)
What Is Starter
Before we begin, let’s answer the age-old question: what is a starter?
A sourdough starter is a combination of flour and water that is used to leaven sourdough bread and is essentially made up of wild yeast and bacteria. After about a week, natural bacteria in the air gather on the starter ferment, creating a bubbly and active mixture.
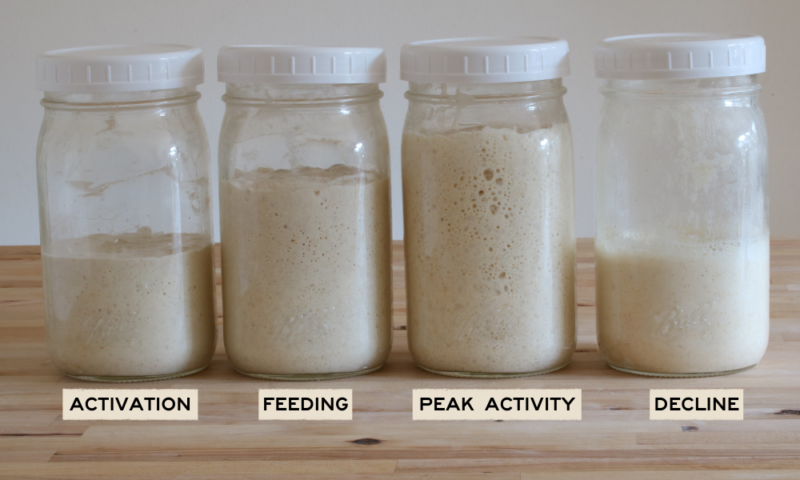
As your starter matures, it will begin to rise and fall reliably with each feeding. With proper care, your starter can last for years!
Now that you know what a starter is, let’s demystify some of the jargon sourdough bakers use.
What Is Sourdough Discard?
“Discarding” is a term commonly used in the sourdough starter world. It’s an integral part of the feeding process and, despite its name, does not necessarily mean throwing the removed portion away.
Instead, it just means that you remove (or discard) part of the starter. You can keep the discard and use it in other things (but you don’t have to).
How do you discard? When you maintain a sourdough starter, you routinely feed it with fresh flour and water. This nourishes the yeast and bacteria, keeping the starter active. However, without discarding a portion of the starter before each feeding, you’d end up with an ever-growing amount of starter that would require increasing quantities of flour and water to keep fed.
This would not only be impractical but would also potentially lead to an imbalance in the yeast and bacteria population in your starter. That imbalance could cause your starter to smell sour and/or taste very acidic.
Do you have to discard every time you feed? No, you don’t. You only discard if you have a lot of extra before you feed. If you have just a small amount, you can skip this step.
If you have a healthy starter, you only need about 2-3 tablespoons of the old starter when you feed it.
So, if you have extra starter, before feeding it more, remove (or “discard”) a portion of your starter. This helps to keep the starter volume manageable and ensures the right balance of yeast and bacteria is maintained.
How To Feed Sourdough Starter
Another term that confuses first-timers is feeding. What is feeding sourdough, and how do you do it correctly?
In the world of sourdough baking, ‘feeding’ your starter means giving it fresh flour and water. These ingredients are the ‘food’ your sourdough starter needs to stay alive and active.
Feeding a starter means adding an equal amount of flour and water to the jar of your starter and mixing it well.
Why do we feed a starter? Your starter is a mini ecosystem of yeast and bacteria, and they need to eat to stay alive. The yeast and bacteria feed on the sugars in the flour, and in return, they produce carbon dioxide (which makes your bread rise) and other flavorful compounds.
Best Flour
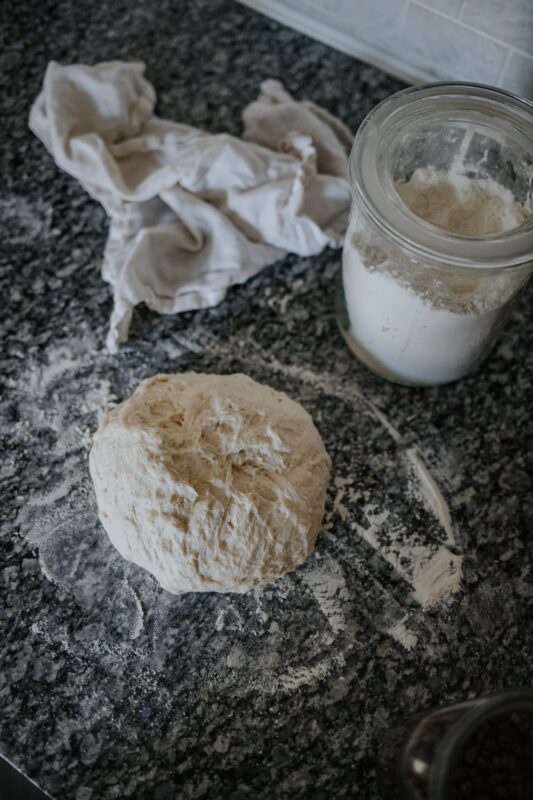
Using the method below, you can use any good quality flour that you want, including spelt, rye or wheat.
If you use 100% whole grain flour, your starter will need a little more maintenance; that’s why I don’t usually recommend it for beginners.
My personal favorite is a mix of high gluten unbleached flour and a little whole wheat flour (the exact amount is in the recipe below.) Since the whole wheat has more nutrients it helps jumpstart the process and white flour is very forgiving and resilient.
If you want to learn more, check out the Comprehensive Guide to Sourdough Starter. There I go into a lot of details about the best types of flour to use and why.
Water
Do you need to use only filtered water in your starter? I always recommend it, but it’s not mandatory, you can use regular tap water.
Many people are afraid that things in the tap water (like fluoride) might kill the fermentation in the starter. That’s untrue. Many people successfully feed and maintain starter with unfiltered water.
Covering Sourdough Starter
The final thing that you need to know before you make your first batch of starter is how to cover it correctly.
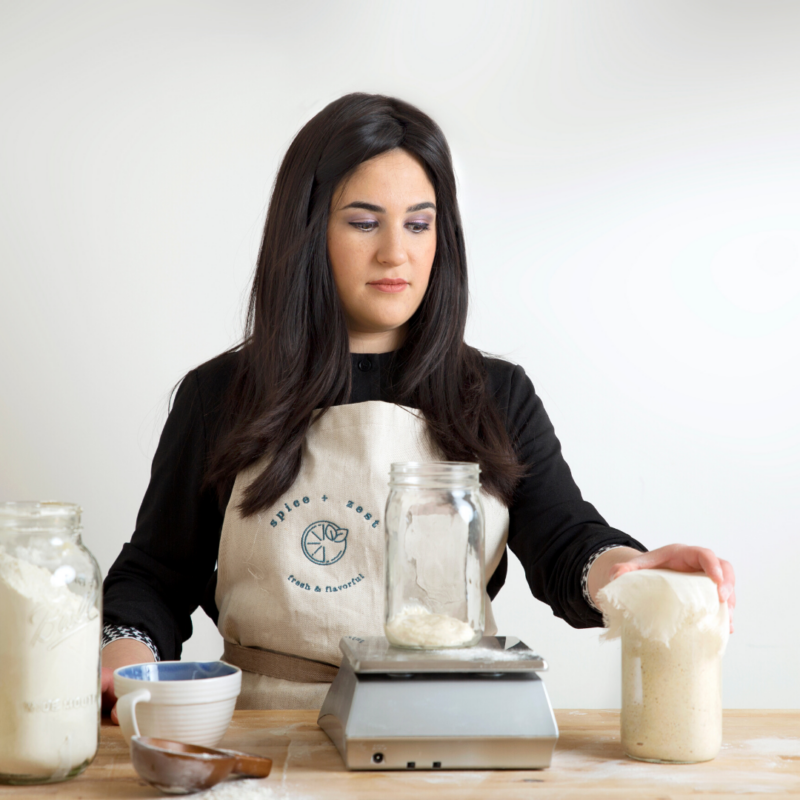
Maintaining the proper cover for your sourdough starter is an important aspect of its care. The cover should protect your starter from external contaminants like dust or bugs while also allowing it space to breathe and expand. But it shouldn’t be air tight.
Let’s look closer at some of the best ways to cover your starter (and why they work).
What Is The Best Way To Store A Starter?
The best way to store your starter is in a container that gives it plenty of room to expand or grow. Cover it loosely with a towel or loose-fitting lid.
Why does it need so much room? A sourdough starter is a living culture of yeast and bacteria, and it produces gasses during fermentation. These gasses cause the starter to expand, and it needs space to do just this. A tight lid can prevent this expansion and might even lead to a build-up of pressure in your container, which could explode.
Here are a few of the best ways to store and cover your starter, using things you have in your kitchen:
- Jar with a scew-on lid: Place the lid on top without screwing it down.
- Piece of cloth: Lay it gently on top so it keeps the dust and things out.
- Coffee filter: Secure it with a rubber band
These covers allow gases to escape, the starter to expand, and also protect the culture from external contaminants.
How To Make Sourdough Starter
Anyone – and I mean anyone – can make their own sourdough starter. Just follow these steps.
Tools
- A jar with a lid. Pretty much any bowl, container, or similar vessel will work, but I prefer a glass jar with a plastic lid, so the closure isn’t completely airtight.
- A kitchen scale. Accurately weighing your ingredients is absolutely essential.
- Room temperature water.
High-quality flour.
I recommend an 80/20 blend* of bread (or unbleached all-purpose) flour to whole wheat flour. After teaching thousands of people how to cultivate a starter, I find this blend to be the most consistent—especially for newbies. Prepare a big batch so you always have it handy when feeding the starter. Although using my method below, you can replace whole wheat flour with pretty much any flour you’d like (such as rye or spelt). The recipe is incredibly versatile!
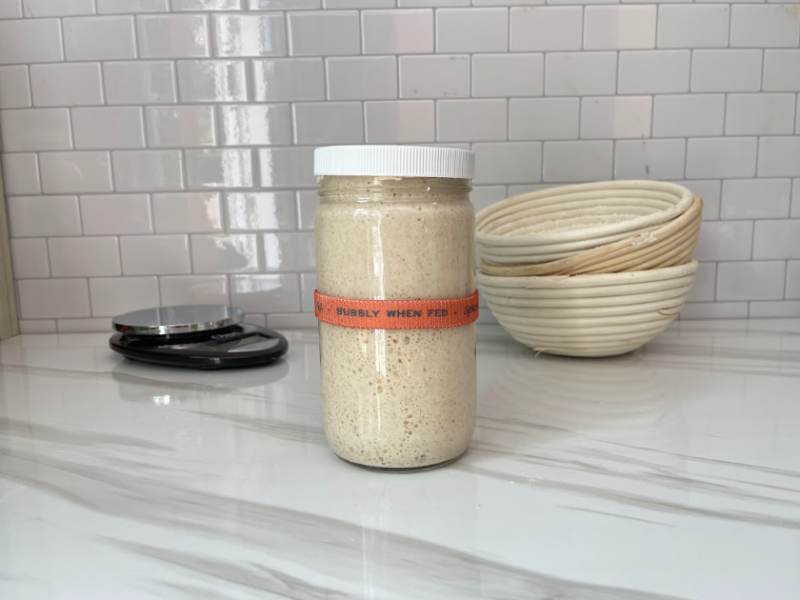
Easy Sourdough Starter
Servings
Equipment
- 1 Jar With A Lid
- 1 Kitchen Scale
Ingredients
- 32 grams Bread Flour
- 8 grams Whole Wheat Flour
- 40 grams Room Temperature Water
Instructions
- Mix all of the above ingredients in your container or jar, cover your jar lightly (not airtight) and let it sit out at room temperature for 12 hours. You will not notice any difference in your 'starter' just yet. Keep the starter at room temperature throughout this process until it’s active.
- After 12 hours, pour off most of the mix leaving behind just 1-2 tablespoons and discard in the trash.
- After discarding, immediately feed the 1-2 tbsp which you kept (which is now your 'starter') using the same ratio as above (32gr bread flour, 8gr ww flour, 40gr water) and mix it. Again leave it out at room temperature for 12 hours.
- Continue 'discarding' and 'feeding' your starter every 12 hours for the next 7-14 days. This time frame varies, and that’s totally normal. Remember that time is an ingredient, just like flour and water. Your starter is a live culture feeding on natural yeasts, so it needs time to ferment. Give it patience!
- On day 2 or 3, you may see some bubbling activity, but after a day or so it will go flat. This is normal! Don’t be discouraged or abandon your sourdough baby. The starter needs time to get fully active. As long as you feed it twice a day, trust that it is alive and thriving!
- When the starter appears to be active and bubbly within 6-8 hours of feeding, perform a float test. To do this, take a spoonful of starter and drop it into a bowl of water. If it sinks, it may not have enough wild yeast and could benefit from another feeding. If the starter floats, it's ready to be used to leaven bread.
- Congratulations- you’ve made your own starter!
- It is recommended to keep the starter at room temp the first 3-4 weeks and once feed daily, this will help strengthen the starter. If you are not around you may store it in the fridge but it may take a few feeding to bounce back
Caring Tips
Easy enough, right? Now that you have a starter, make sure you take proper care of it, too. With regular feedings, your starter can last a lifetime. In fact, my starter, which is named Chaos, is over a decade old and going strong! And yours can, too.
Here are some tips on how to keep your starter healthy and ready to use when you want to bake:
- Store your starter correctly. An active starter should be stored in a covered container or glass jar with plenty of space for expansion.
- A starter is best maintained at 70-75°F (21-24°C). Feed your starter daily for the first 2-3 weeks with equal parts of flour and water to ensure it stays active and ready to bake.
- If you plan to store your starter for an extended period, feed it 40g flour and 40g water and place it in the refrigerator for up to 6-8 weeks. After removing it from the fridge, you may see some dark liquid on top of the starter. This is known as “hooch” and it’s a byproduct of fermentation. Simply pour it off and give your starter a feeding before using it in a recipe.
- When feeding the starter, stick with the same flour. If you want to change flours give it a few feedings to bounce back to its normal, bubbly self.
- You can use any flour in your bread recipe with the starter you have- no need to make a special spelt starter for spelt bread. Your starter is versatile!
- Discarding Starter: It’s important to note why we discard a portion of the starter during feedings. This is to ensure that the yeast and bacteria always have fresh food (flour and water) and enough room to grow, and it also maintains the correct balance of yeast and bacteria. If we kept adding to the starter without discarding, it would become too large and potentially out of balance.
- ***Pro tip: You can’t feed a starter on Shabbat! Make sure to feed right before and after. And like all things made in nature, your starter is healthy and hearty. Don’t worry if you miss a feeding here or there. Just get back into the groove as soon as possible.
Sourdough Starter Smell
One of the most common questions out there is, “why does my sourdough starter stink?” Well, it’s supposed to; it’s part of the fermenting process. Here’s why (and what to do about it).
Creating a sourdough starter is a biological process, and it can sometimes include a phase where your starter might smell quite strong, even unpleasant. This is often part of the natural process of fermentation and the establishment of a balanced community of microbes in your starter.
In the initial days of creating a starter, when you combine flour and water, you’re providing an environment for a variety of yeasts and bacteria present in the flour and in the air to start growing. Some of these microorganisms can give off a strong smell as they start to ferment the mixture.
The smell can be compared to gym socks, sour milk, or even acetone-like. This is usually due to an imbalance between the yeast and bacteria in the early stages of developing your starter. Certain bacteria that can initially proliferate, like leuconostoc bacteria, can generate off-putting odors.
But don’t worry; this doesn’t mean your starter is ruined! The solution is patience and continued feeding. Keep discarding part of the starter and feeding it with fresh flour and water as directed in your recipe. Over time, the healthier lactic acid bacteria and wild yeasts that you want in your starter will begin to dominate and bring the whole system into balance.
As this happens, the smell of your starter will mellow out and become more pleasant. It will start to smell mildly sour, fruity, yeasty, or like yogurt – these are all good signs! This can take a few days to a week or more, depending on various factors like temperature and the specific microorganisms in your environment.
In short, a strong smell in the early days of a sourdough starter is not a cause for concern. Stick with it, keep feeding it, and soon enough you’ll have a healthy and active starter ready to leaven your homemade sourdough bread.
Hooch
If you’re wondering, “why is there water in my starter?” Don’t worry. You didn’t ruin it. This is called hooch and it’s normal. Hooch is water that accumulates on top of the starter. Simply pour it off and feed your starter again like normal.
Final Thoughts
Ready to bake? Let’s make some bread! Follow my easy sourdough bread recipe to get started. If you want to learn more about your starter, read our guide about how to maintain and use a starter. Before long, you’ll be a pro sourdough baker too!


 What Is Sourdough? Beginner’s Guide
Hello,
I am excited to try this. I am a beginner. Do you by chance have any videos on the sourdough parshah? I think that would be helpful.
Hi Meira, We have step by step videos as part of the online course which you can find in the shop tab.
Hi!
I’m making a sourdough starter for the first time! After how many days will the starter be ready to use?
Hi Peri, it can take anywhere from 7-14 days usually depending on the enviroment and flour you use… During the warmer months it generally takes faster to be ready to use.. Follow the instructions above and look out for the signs mentioned in the post. Good Luck!
Hi, in some part of this guide it says to deed the starter daily yet other parts mention every 12 hours. Is it 12 or 24 hours?
Hi Sossy,
When creating a starter from scratch, you should feed it daily twice a day, (every 12 hours), to help it develop properly. Once it’s mature, you can reduce feedings to once a day. Hope that clears things up.
I bought your starter kit. I followed and only did 40g but I want to be able to have left over starter for future bakes. If I’m always discarding and only have 1-2 tbs to feed following your steps. When do I know the starter is good and can use to bake and then I assume I just keep 1-2 tbs ? Don’t I need 100g for a bake ?
Hi Izzy,
Once your starter is active and bubbly, you can feed it based on the amount your recipe needs. For instance, if your recipe calls for 200g of starter, feed 1-2 tablespoons of your existing starter with 100g of flour and 100g of water. Allow it to sit at room temperature until it’s bubbly and doubled in size before using it. For tips on maintaining and feeding your starter, check out my next blog bost how to maintain a starter..”
Hi,
I see that you noted to feed the starter right before and after Shabbos, Is it better if I put it in the fridge for Shabbos – it’s 6 days old? Also because it’s going to be less than 12 hours from the last time I fed it if I feed it right before Shabbos?
Thank you
If you do not have an established starter yet then it’s best to keep at room temp even if you won’t feed it within 12 hours…
You can feed your starter right before Shabbos, it really doesn’t matter if it is not exact timing…
My son can’t have regular wheat. How can I make a starter with just spelt flour?
Hi Malka,
You can follow the same method mentioned in the directions when using spelt flour.
Hi! I finally established my first starter thanks to your very clear instructions! I’ll only be able to use it tmrw, do I leave it on the counter till then? And if I want to bake my loaf on Friday morning when do I start the process on Thursday? Thanks so much!
That’s amazing! So happy to hear your starter is thriving!
If you’re using it tomorrow, you can leave it on the counter and feed it a several hours before you plan to bake—just make sure it gets bubbly and doubles in size before using.
For a Friday morning bake Check out my Basic Country Loaf post for the full step-by-step! Happy baking!
https://spiceandzest.com/recipes/basic-sourdough-recipe/
Hi,
My starter is 11 days old. It behaves like ready-to-use starter – full of bubbles & doubling/tripling in size when it peaks- but it still smells very acidic/acetone.
I feed it twice daily, it’s in a cabinet that’s around 75F, I’m using filtered water and unbleached wheat flour…. I’m feeling stumped.
(I’ve made starter in the past and it was ready on day 7 or 8)
Any suggestions?
When feeding, make sure you’re discarding most of the old starter each time — sometimes a buildup can cause the pH to get a bit off balance, leading to that strong acidic or acetone smell. Keeping only a small amount (like 1-2 tablespoons) before feeding can help reset things and encourage a healthier balance.